Soo… let’s talk Pinterest for a sec.
It’s no secret that Pinterest is still one of the best traffic sources for bloggers, especially if your content is visual, helpful, or inspiring. But if you’re not making it easy for your readers to pin your images, you’re leaving traffic (and potential future fans) on the table.
Good news? You can fix that in less than 2 minutes! Here’s a detailed guide on how to add a Pinterest Pin It button to all your images in WordPress – without any code or tech headaches 😊
It’s beginner-friendly, lightweight, and totally free. Let’s make sure your beautiful blog images are ready to be saved and shared!
Now, if you are a visual learner and prefer video tutorials, here’s one for you ☺️
In This Guide:
NOTE: All my WordPress tutorials focus on WordPress.org, not WordPress.com. If you’re curious about the differences, here’s everything you need to know ☺️
Why You Really Need a Pin It Button on Your Website
Let’s zoom out for a second.
You’re putting in all this time to create blog posts, right? Writing, formatting, designing graphics…
But here’s the question:
Are you making it easy for people to share your content with the world?
Pinterest is not just another social media platform. It’s actually a visual search engine.
Which means your content can keep working for you months (even years) after you publish it. That’s the beauty of Pinterest traffic ☺️
But here’s the catch: Most readers won’t pin your content unless you make it super easy. And I really mean supper super easy…
They need to see a little Pinterest Pin it button right there on the image.
First of all, it serves as a visual reminder that they can save your amazing post for later.
It also makes it easy to save the image without having to install a browser extension. A one-click solution.
If they have to work for it? They won’t bother. They’ll just scroll past 🤷♀️
Step-by-Step Tutorial: How to Add a “Pin It” Button in WordPress
Ok, so let’s make this as easy as possible:
- Log in to your WordPress dashboard
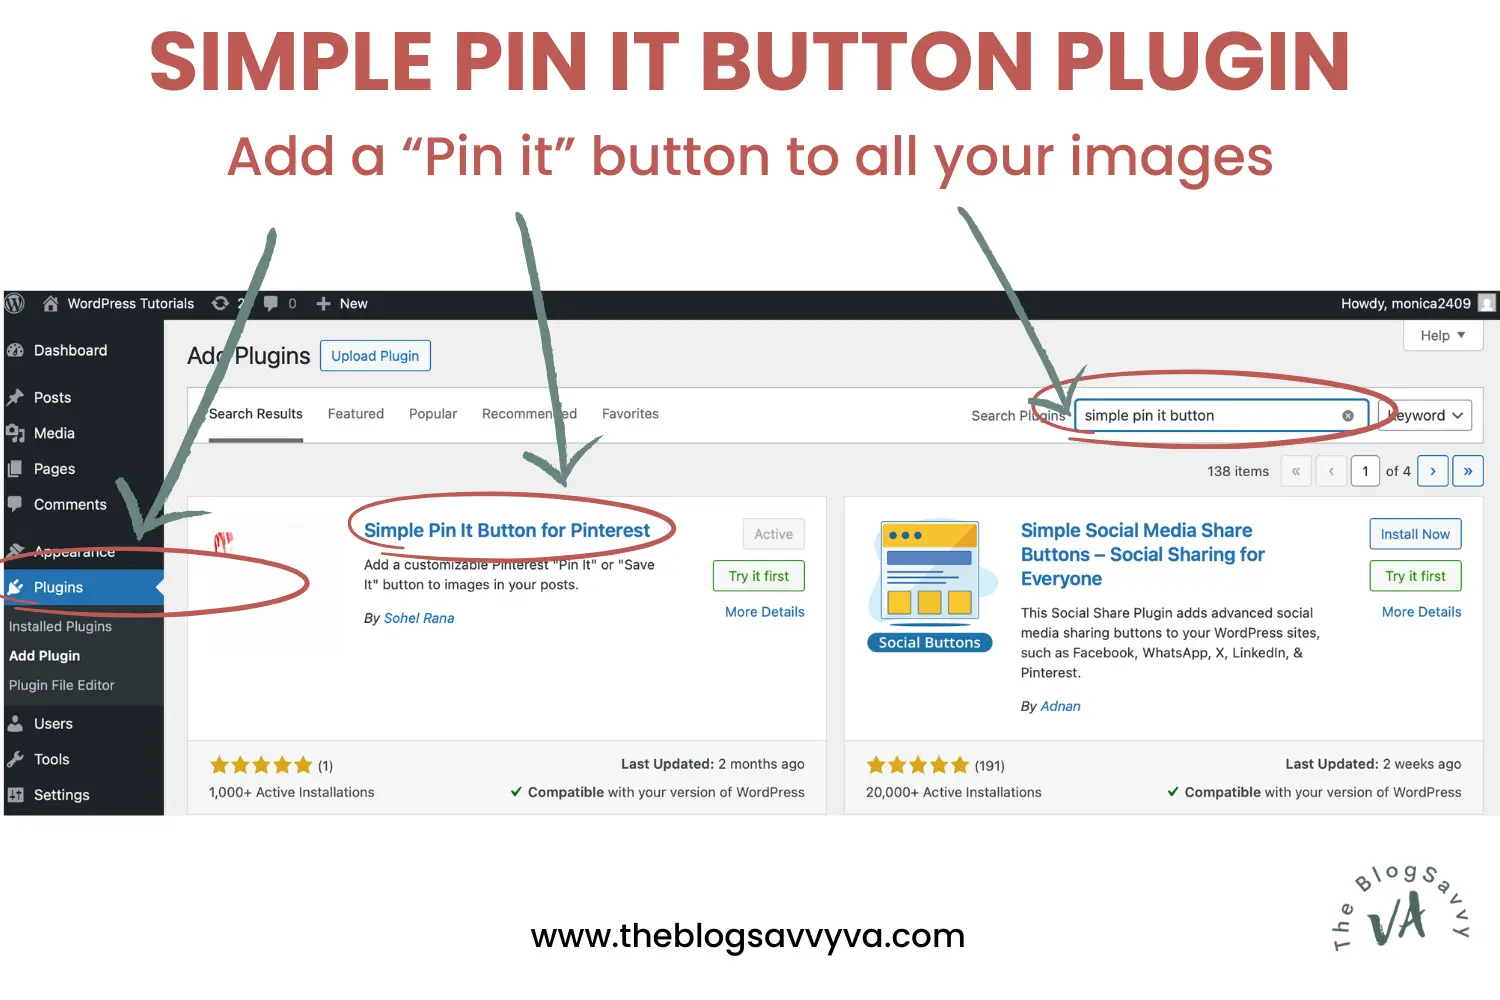
- Go to Plugins > Add New
- In the search bar, type:
Simple Pin It Button for Pinterest - Click Install Now and then Activate
Just like that, your Pin It button is live!
But hang on, we’re not done yet…
Customize The Pin It Button to Match Your Brand
Now let’s make the button match your blog’s vibe:
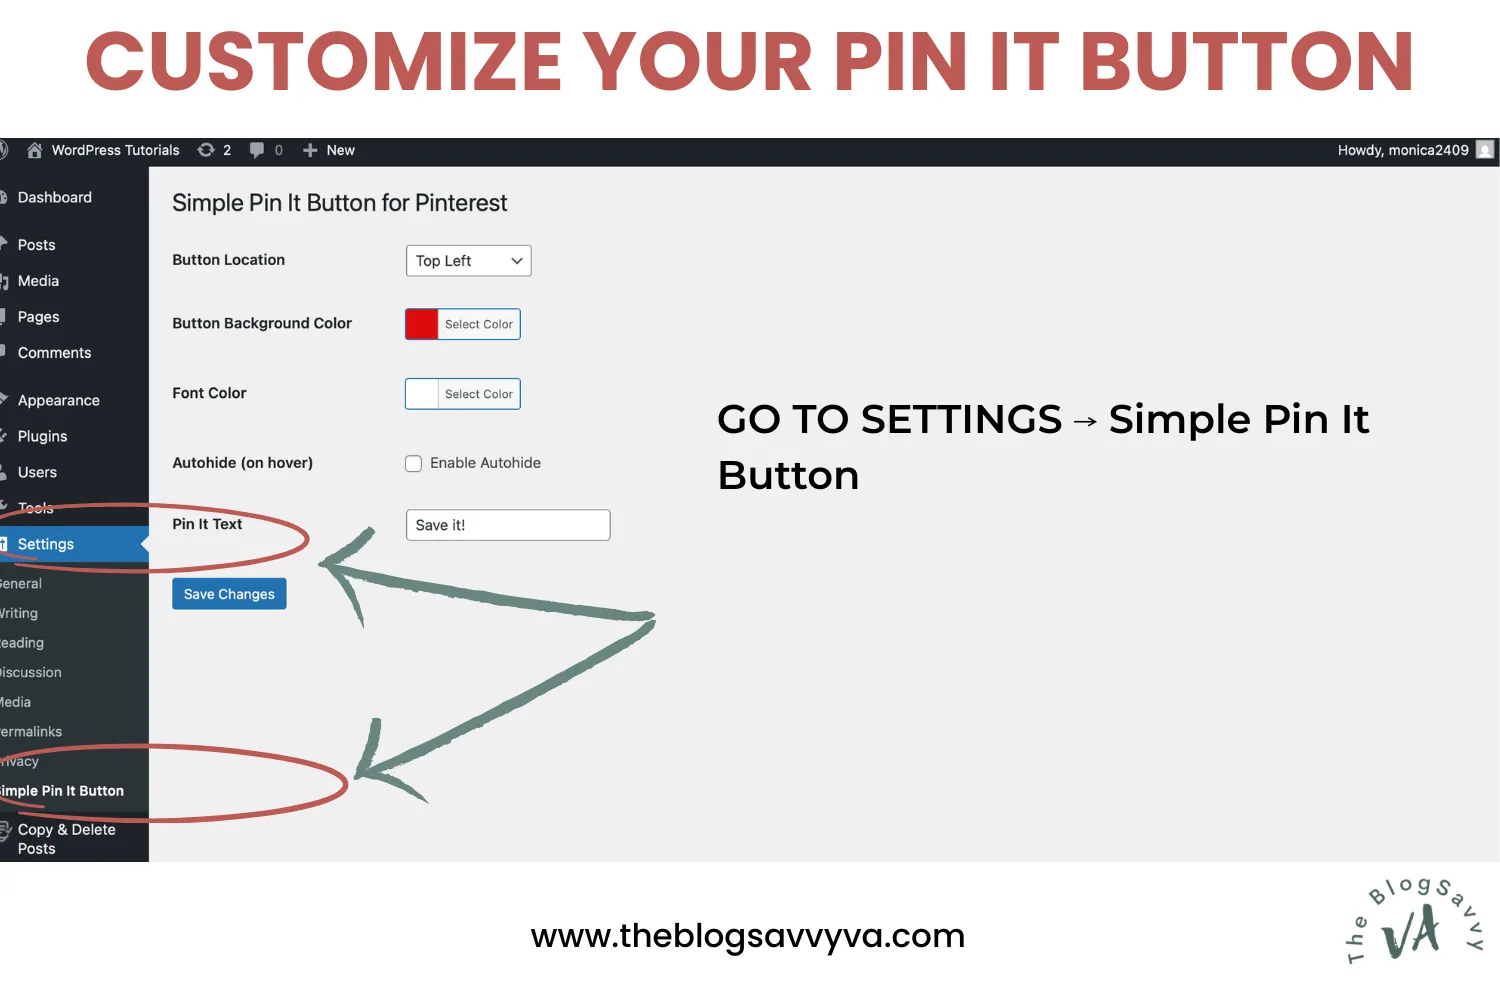
- Go to Settings > Simple Pin It Button for Pinterest
- Adjust things like:
- Button position (top left, center, etc.)
- Background color and text color
- Custom button text (you can change “Pin It” to anything you like)
- Autohide on hover
Tweak it until it feels like you 😎
Adding a Pinterest Pin It button might feel like a small thing… but it’s these little tweaks that build momentum over time.
More pins = more eyeballs on your content = more opportunities to grow your blog.
And remember, if you ever feel stuck on WordPress or overwhelmed with the tech side of things, I’ve got you. That’s what I’m here for ❣️
PS: While you’re growing your website, have you made sure your site is safe from bots, hackers, and spam?
I know it’s not the fun part of blogging, but website security is so important. I’ve seen way too many bloggers ignore it… until it’s too late.
That’s why I created a free WordPress Security Checklist. It walks you through the basics step by step, grab it below!


